When it was time to decorate my son’s bedroom, I created this Lego bedroom wall using masking tape and wall paint.
Moving house gave me the ideal opportunity to give Kamran a bedroom upgrade from nursery to first stage ‘big boy’ bedroom.
He wanted a Lego-themed bedroom as he was obsessed with the characters from the movie.
You Will Need
Wall Paint in red, blue and yellow
Masking tape
Acrylic paint pens
Paint brushes, rollers and paint tray
I have included links to some products. As an Amazon Associate, I earn from qualifying purchases.
HOW TO - Painted Lego Wall
Step 1
Masking the Lego Wall
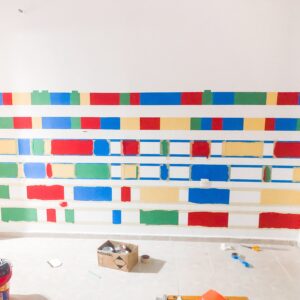
The photos are not the best, they were taken 2 years ago when we started the transformation (they were really only meant to show off my progress to a doubting hubby)
Masking the wall took me almost a whole day, by the time I got any paint on the wall it was really late.
The hardest part was to get the lines straight(ish) and sectioning the wall. I had made a template of what 1 brick would be as I really wanted the demotions accurate.
I mapped out every other row and every other brick. There was a lot of masking going on that week, and a lot of trips out to buy more masking tape.
Step 2
Painting the Lego Wall
It was very late in the day, with no plan as to colour coordination, or which brick would be which colour, I got stuck in painting random bricks.
My paint colours were red, yellow and blue and included in my master plan was the idea to mix these to make other colours.
Hmmm, I hadn’t really thought that through… I mixed a green colour one day and orange the next but, of course, when those colours ran out then I had no way of matching the colours again….
Back to plan A, red, yellow and blue.
Step 3
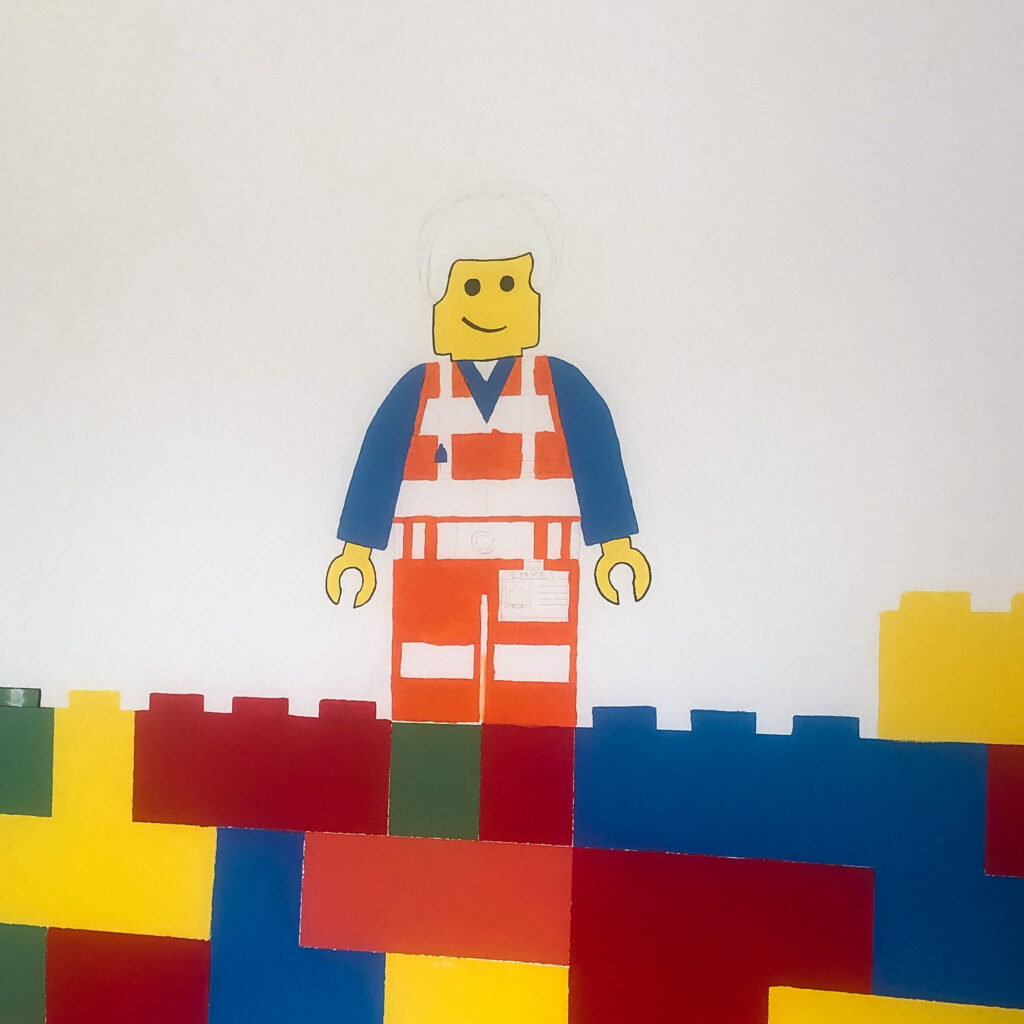
Painting Lego Figures
I drew the lego figures free-hand, some easier than others and some with better results than others.
Every time I see Emmet I think he needs surgery on his head to put it right (cruel really but I know that one day he will be painted over).
Benny the spaceman was so easy in comparison, the fact his head is helmet-shaped probably helped.
The main features of the figures I painted with a brush using acrylic paints and for the more detailed bits, I used acrylic paint pens. N.B don’t be tempted to use Sharpies for the outlines, if you try and paint over the Sharpie ink then it just comes through – not ideal when it is obvious that sometime in the future the Lego décor will need to be replaced when ‘grown-up stage 2’ bedroom is required.
Step 4
Outline of the Lego Brick Wall
For the outlines I used a black paint marker, actually, I used 3! It took some perseverance as it was hard work. However, I am glad I did the outlines instead of swerving that task, it looks better than I imagine it would look without.
Step 5
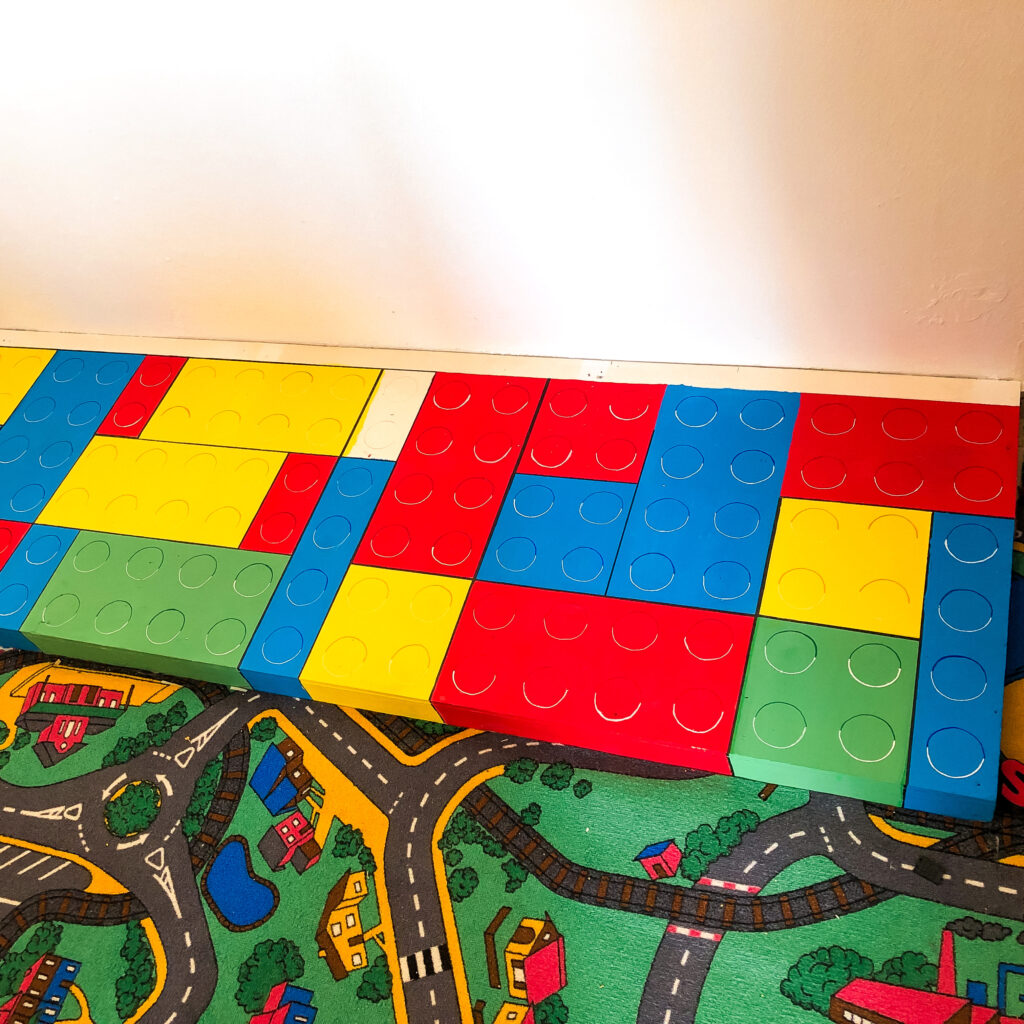
Lego Floor
We had already decided that the floor would be carpeted, and with the ‘street map’ carpet due to Kamran’s love of his cars and playing on the floor with them.
There was a fitted wardrobe in the room that was taken out, given the amount of space it took up, it offered minimal storage.
Always a surprise waiting, it had been built on an uneven concrete platform and taking it out was the easy part so the knee-jerk reaction was – build a wooden box around it.
Enter Mr Dave. He gave me his ‘knowing’ sideways glance he always has when I am planning something and 2 days later Kamran had a painted Lego brick floor to match his walls.
I love the floor bricks, they were so much simpler to do than the wall.
They were done in a very similar way to the walls. I had a ‘one brick’ square stencil I made with a hole in the middle.
After priming then masking the floor, I painted the different colour bricks.
I drew around the circle in the template on every Lego brick. The top half of the circle in black, and the bottom half in white, that gave the Lego brick a 3d effect.
To finish the floor I used about 5 layers of floor varnish.
Step 6
Moving in
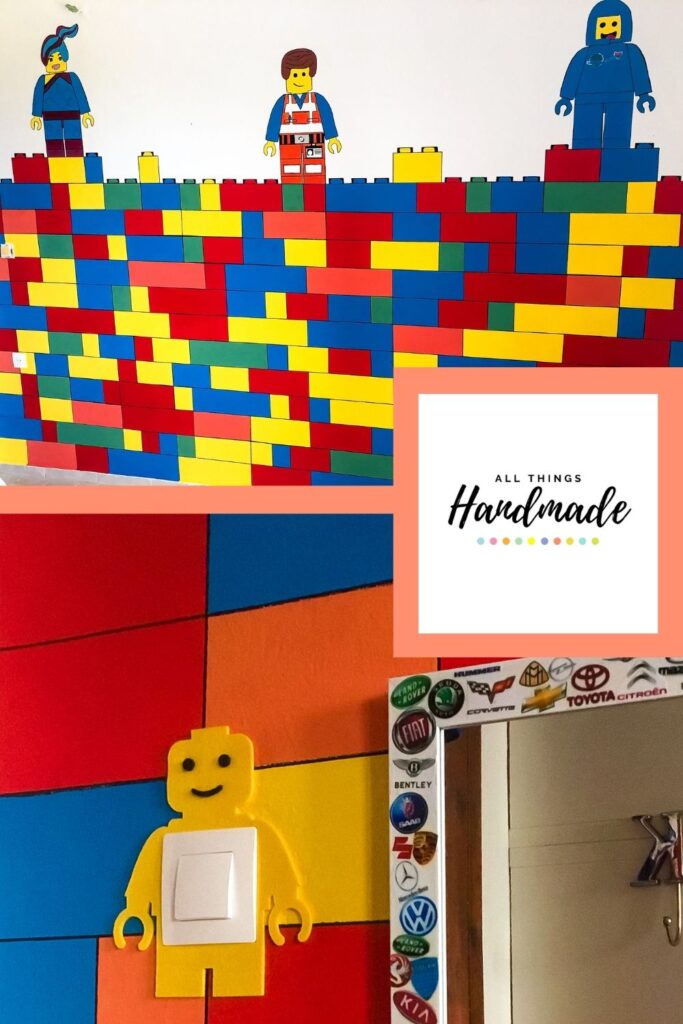
I painted the wall 2 years ago this April. The room has had several shifts around since then. Poor Benny has had his arm covered by an Ikea bookshelf to store hot wheels cars and a lot less of the bricks are visible now. I don’t think the lego wall will last more than a couple more years, to be honest, but for now, we still love it.
Not ready to make this right now?
Don’t forget to pin it for later!
For more ideas check out my other posts on the blog page.
Or head across to our youtube channel All Things Handmade for more diy and party planning videos.


