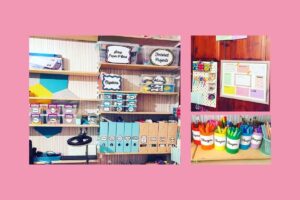
This week I have been trying to organise my desk and office space more. Until we can sort a more permanent solution, I am in the corner of the dining room. It comes with a few issues, mainly light and space.
Hopefully, as soon as my husband cuts them, I will have shelves on the wall. Once that happens, I can start to organise and have a clear space to work.
Until then, I still needed a whiteboard. I have notebooks everywhere, different ideas, to-do lists, and things I need to know all the time. Inevitably, I am always looking for the one page in a book I cant find.
I’ve been searching for whiteboards online. They were all very generic and, to be honest, too white. I knew what I didn’t want and had a basic idea of what I did.
I didn’t want a whiteboard with a silver frame. They look a bit too clinical and didn’t go with the decor in my house. And I didn’t want a white whiteboard.
As silly as that may sound, it just didn’t appeal to me. I wanted something to fit in with the photo wall and wallpaper surrounding it.
I also wanted something pretty and girly. I live with my husband and son, so most things I make tend to be cars or Roblox themed. This was for me, and I like pastel colours, butterflies, and flowers. (as cliché as that may sound)
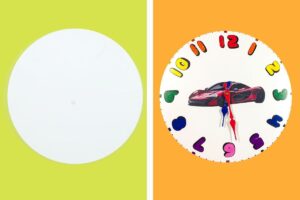
Photoframe
The frame I bought was very cheap. In fact, from the local homeware shop, it cost less than the whiteboard I bought for my son’s bedroom.
I liked the grey wood effect frame and the sections. The sections appealed to me, as it would be easy to separate my notes in different colours.
Choosing the Paper
I had various scrapbook papers and pastel coloured paper I began to sort through.
Some of the scrapbook paper would be too dark to write on so they were put to one side for future projects.
I found four different pieces that were light enough for the whiteboard but still had a pretty design.
Lettering
With the plain pastel paper, I wanted to add some headings, to organise the whiteboard.
I printed some different fonts, that I loved and thought fitted the style of the board. These could be printed directly onto the paper, but I preferred to trace them with sharpies to give a more handmade feel.
Decorating The Frame
After gluing down all the sections, I wanted to add more details to the whiteboard. I used a selection of Washi tape, masking tape, and Sellotape I already had.
I tried to get a handmade, stuck on notes kind of look.
Finishing The Whiteboard
Putting the photo frame back together was easy, getting my husband to hang it for me was not so easy.
Now it is finished, I completely love my new (not so) whiteboard. It looks handmade and pretty which was exactly what I wanted. Now I just have to use it to keep myself organised.
I’m pretty sure that as soon as my husband finishes his outside office, (I’m kicking him out into a shed) he will want one for there too. Maye not quite so pastel and pretty.


