This week I got my Craft and office space makeover. It has been said before but this week it actually happened. I’m going to take you through what we did to create my beautiful craft and office area that I completely love.
My Existing Desk and Craft Area

This was my existing desk and craft space. Not much to look at I know, but it was mine.
It has been a bit of a story in itself regaining custody of this desk, what with Covid and homeschooling, but it is back to being my desk now.
Putting up Shelves

The only problem with my desk has always been the lack of storage. Craft materials tend to take up a lot of space, far more space than Dave is happy with.
I needed shelves, lots of shelves. I have a wall straight in front of me, so my solution was to fill that up with storage. To the right of me was a sliding wooden door to the kitchen, but I will come to that after.
Luckily for me, maybe not so much for him, Dave had wood. He always has wood. Maybe it was the wood destined for my pull out spice rack I still haven’t got yet. (Just because I know he will read this, but as I’m not writing to him it can no way be classed as nagging.)
So after a few weeks of politely reminding him, in my sweetest voice possible, he cut me some shelves. Ok, so it wasn’t all his fault I had to wait. Originally I was adamant in wanting either floating shelves or individual brackets, instead of the white rails that I hate.
Eventually after deciding that we could neither find nor afford what I wanted I gave in and used the white rails we already had in the garage.
On To The Fun Stuff – Organising Craft Supplies
The first step of organising my craft desk came with deciding what didn’t need to be in draws. The draws were absolutely stuffed full of all sorts of paper, pens, yarn, and general craft supplies.
First on my hit list was my Sharpies!
Sharpies
I do have a bit of a Sharpie obsession! In my defence, I always buy them when they are cheap because mine are constantly being used and run out. I actually went through them this week and got rid of the pens that just didn’t work anymore, as heartbreaking as it was.
The problem with having so many Sharpies is that the right colour is always at the bottom of the box. How to solve the problem?
Empty tins! I always save a collection of empty tins and jars, varying in size, just because, well you never know….. Party games, decoration, storage, Sharpies….

With the help of some PVA glue, coloured paper, and a sharpie of course, I solved my problem. And these we the first item to make it out of my draws and onto my newly finished shelves.
I have started a few craft projects since putting the sharpies in jars and it is fantastic. Having every colour I need just in front of me is great.
I did watch a few craft room organisation videos while I was planning my shelves. A few of those suggested not storing pens upright as apparently they don’t last as long.
I use my sharpies so often that I don’t think it will make much of a difference to how long they last. I plan to do some more research on this to find out if it is opinions or whether there is evidence to back it up. For now, I am happy enough to keep them right in front of me where I grab the right colour straight away.
Storage Boxes
Do you ever have that one thing you purchase and love so much you end up re-purchasing for every room? For me, it is particular storage boxes.
They are made of plastic which I think is the only downside to them but I struggle to find an alternative as good. I love see through storage boxes that don’t break when they are dropped. I’m a bit clumsy, so apart from my glue, I have been banned from keeping things in glass.
The upside, and the main reason why I love them, is these boxes are really really strong. I have used them in my son’s room to store hot wheels cars by brand. I’m pretty sure when the hot wheels phase is over, realistically not any time soon with him, they will still be in one piece to store other things. In 30 years, I will probably store my grandchildren’s toys in them.
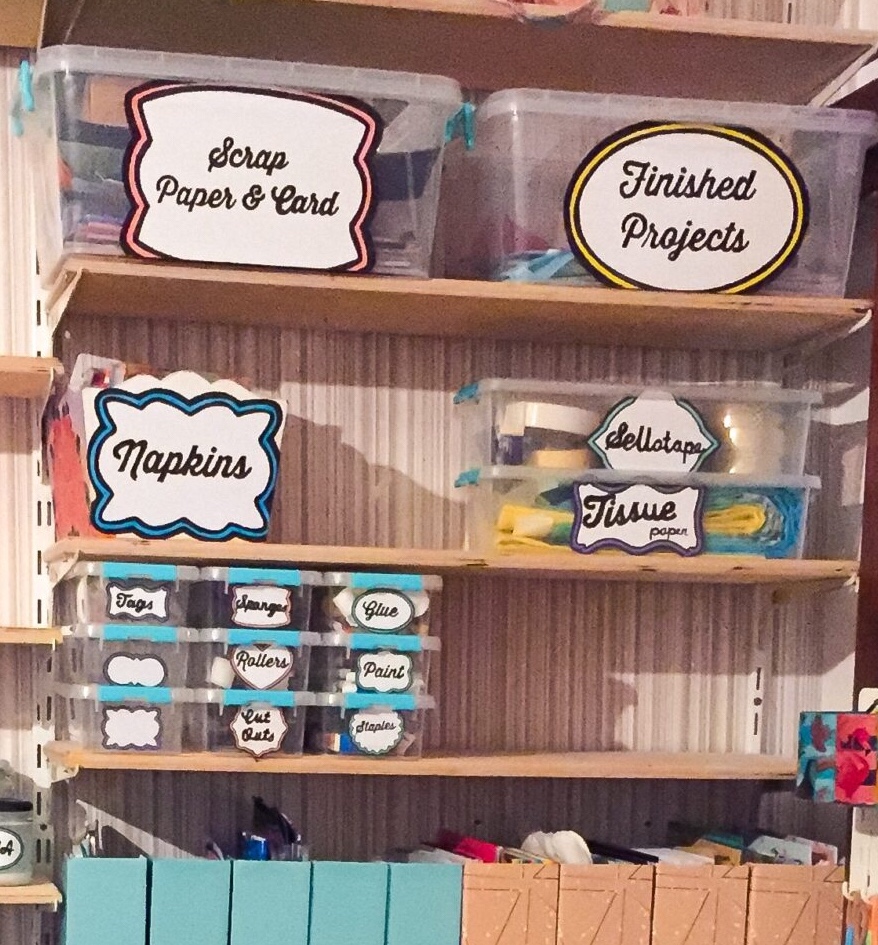
They are from a shop here in Greece called Jumbo, which is one of my favourite shops to buy craft supplies. They have so much variety there I could, and have, spend hours in the craft aisle.
The boxes cost me about 1 euro for the small and 2 for the larger boxes. I love the clip lids the best, I can’t stand fiddly push on lids that don’t shut properly.
The labels I printed out different shapes, then added a coloured border around them. I was trying to tie in all the different boxes etc, so they looked colourful and interesting but uniform.
Magazine Files
The magazine files I already had so they just needed a matching label. I have stored cutting mats, craft books, notebooks, etc in them. I have also stored some paper in them but this is more temporary until I can get some trays that lie flat when the shops are open after lockdown.
The False Door
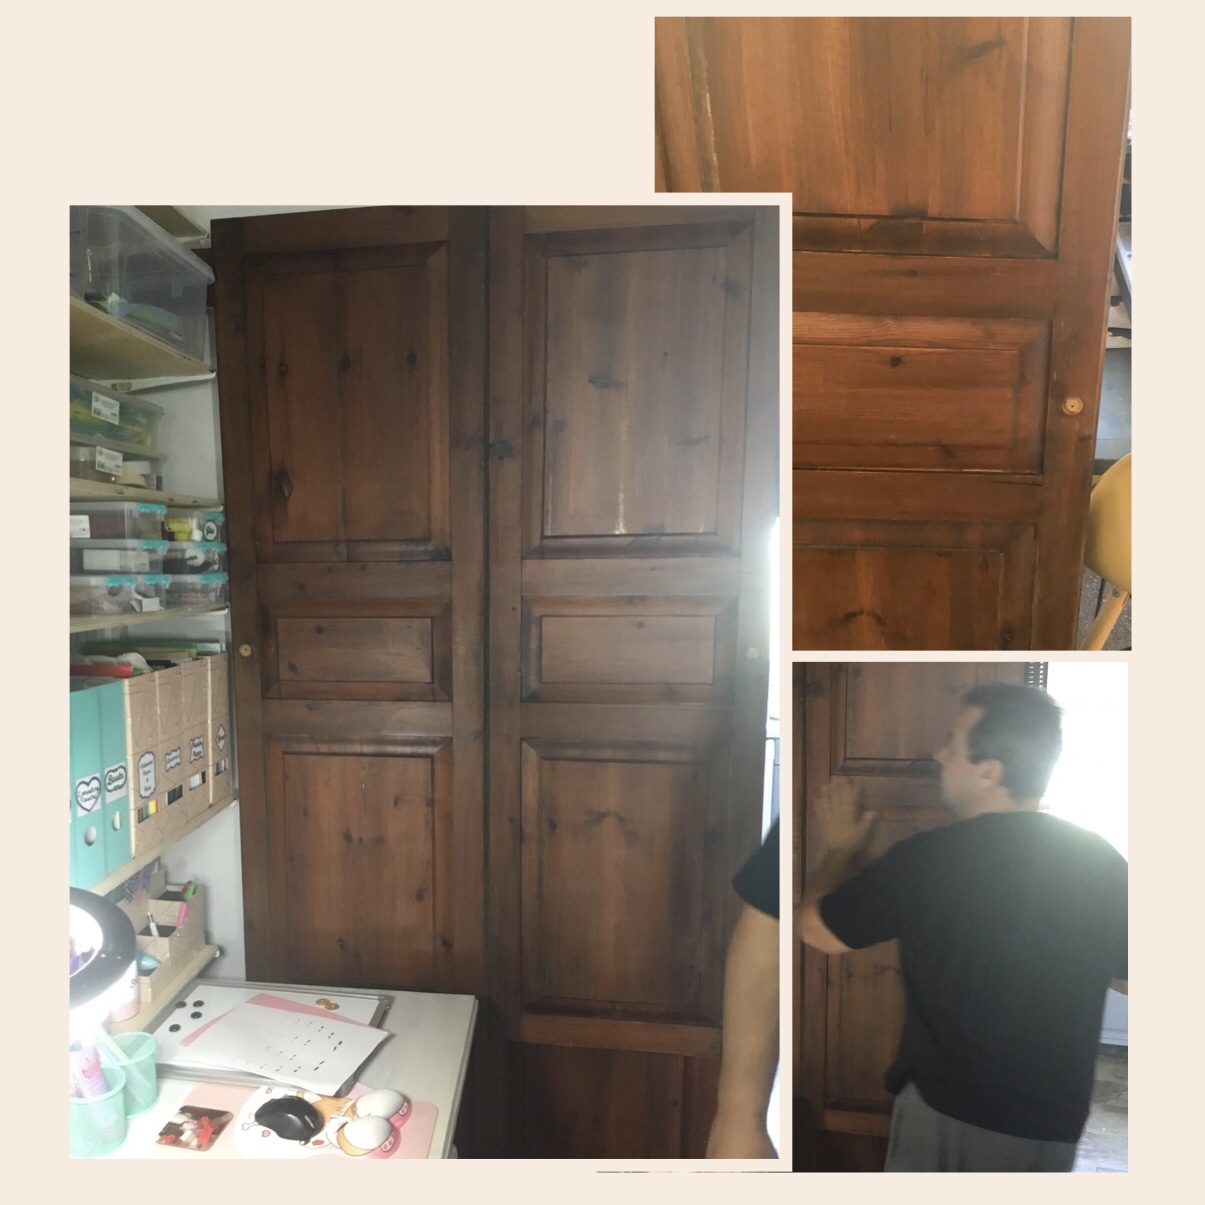
One of the main problems I had in my craft and office area was the lack of wall space. I needed somewhere to hang my Ikea Skadis peg board and my DIY whiteboard I had just made.
Although I had the wall space behind the desk, which is now taken up by shelves, I had nowhere to the side where I could reach things on the wall.
To the left of my desk is the front door, and to the right, we have a big sliding wooden kitchen door. We never shut the kitchen door but it would be impractical to hang this on it and ruin the wood.
Enter Dave with his genius ideas. I mentioned in one of my previous posts that when we moved in we had taken down some wardrobes. There were two we took down. One we have kept and used in the downstairs apartment and the other (that we replaced with a modern wardrobe) has been broken up.
Dave is a hoarder. He keeps every scrap of wood he can, in fact, he keeps every everything he can. Anyone need an old plug? We have about a thousand of them.
So when I was complaining about the sidewall and not being able to hang anything in walks Dave with a couple of wardrobe doors. (I’m pretty sure I suggested it first and he pretended he hadn’t heard me.)
Well, whoever decorated this house before must have used the same pot of stain on all the wood as they matched perfectly. He used some scrap wood (guess it does come in handy sometimes) to joint 2 doors together, and some metal brackets to hang them over the door rail.
Hanging Storage
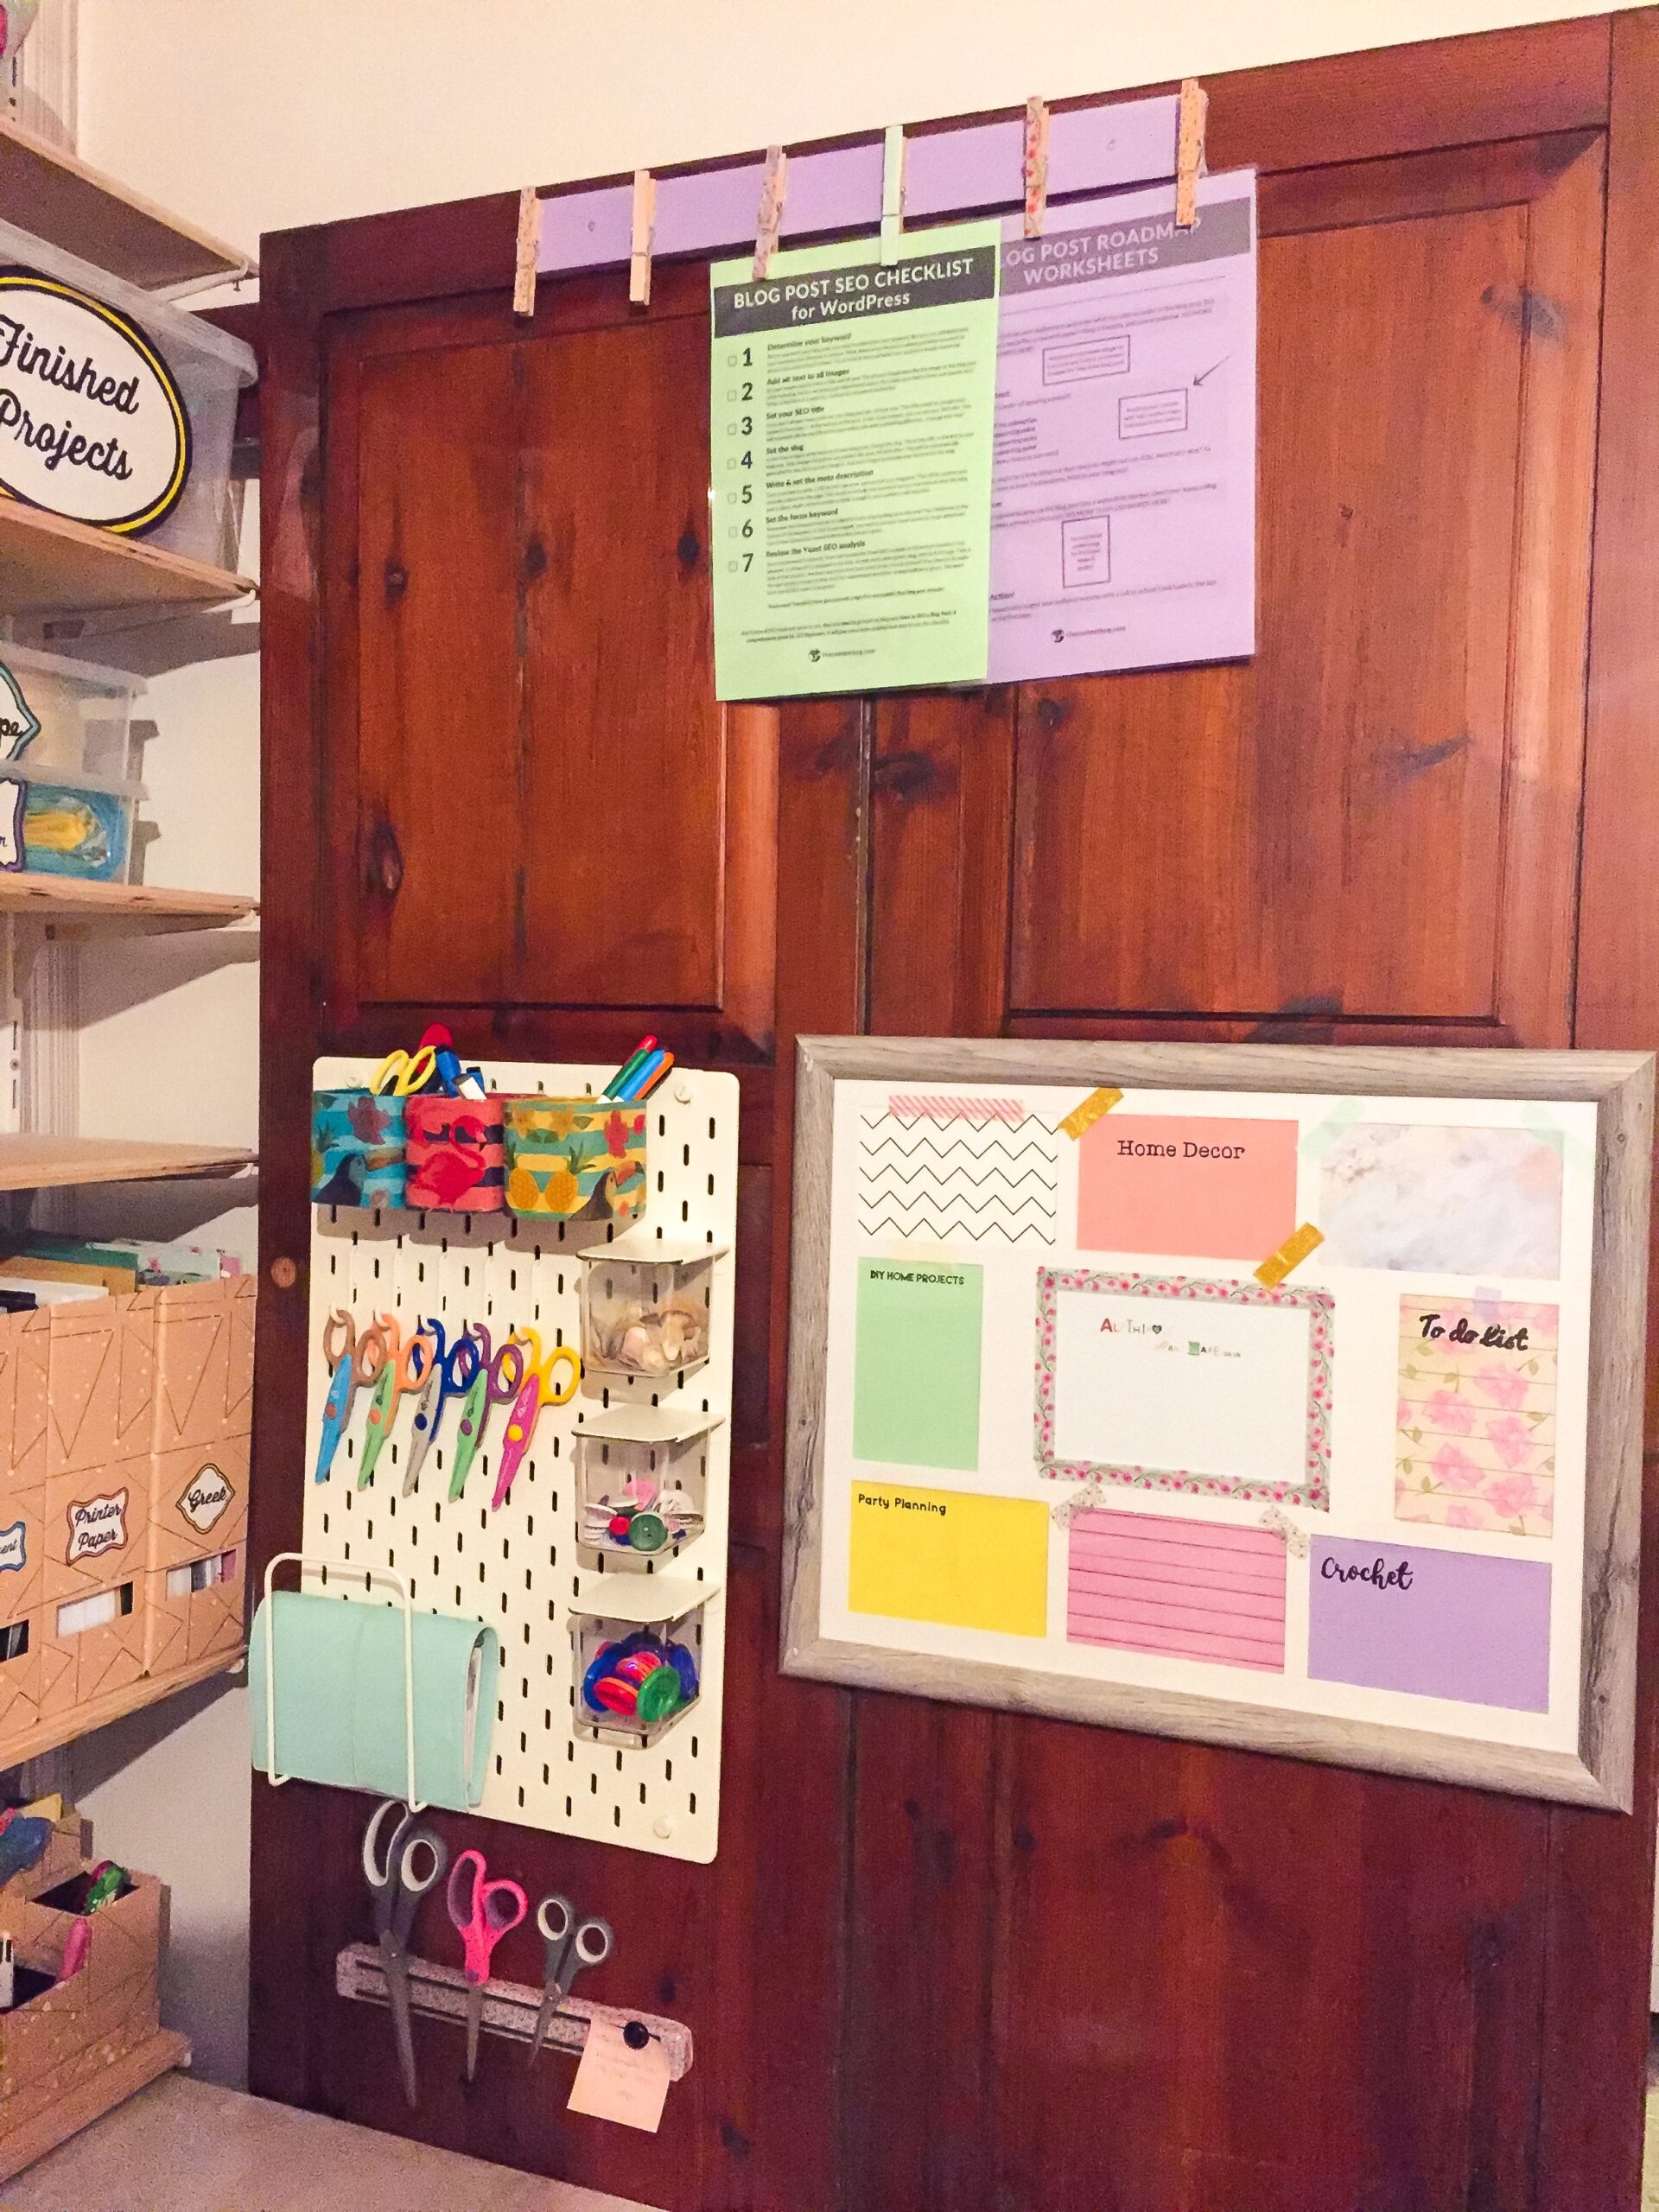
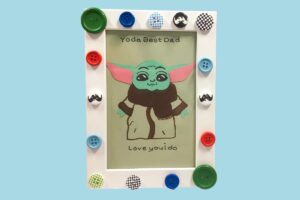
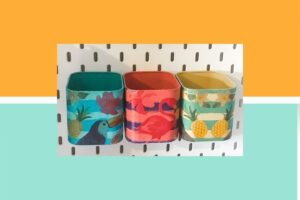
So finally I had somewhere to hang my DIY Pretty Whiteboard and my Skadis board with decoupage containers.
I will add the videos below for the videos from All Things Handmade YouTube Channel for how I made the whiteboard and personalised my Skadis containers.
I made the scissor storage with an old magnetic knife storage block I found in the kitchen. I covered it in some washi tape with PVA glue on top and it was fit for a craft space.
The picture hanger at the top is mainly for the pictures Kamran presents me with frequently. I have one in his bedroom also, for the things he brings home from school and wants to display.
They were really simple to make. As I said, David keeps every scrap of wood he ever comes across. This piece actually came with my dishwasher when it was delivered, some part of the packaging I think.
I wanted it done quickly, so instead of painting it, I covered it in purple paper stuck down with PVA glue and a layer of PVA glue on top.
The pegs were stolen straight from my washing basket. (Next week I will be complaining I don’t have enough to hang out socks.) With the help of some washi tape, I decorated them and glue gunned them on.
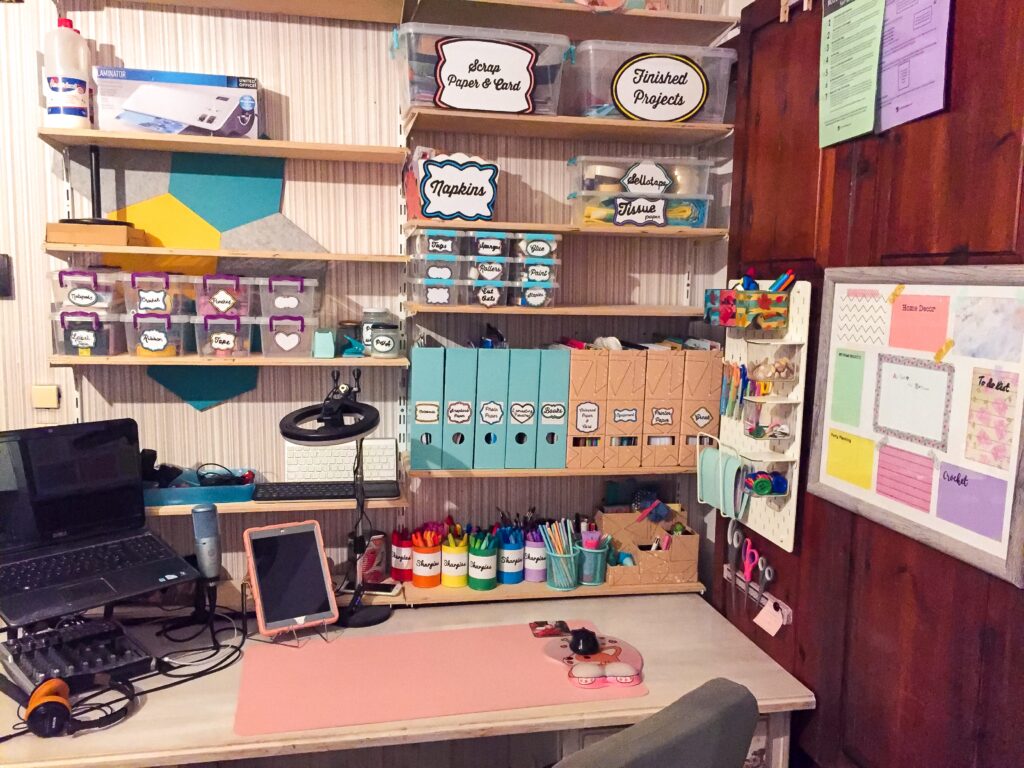
The Finished Craft And Office Space
This is my finished craft and office space. I am absolutely in love with it. It makes me so happy even just sitting here writing at the desk. I have my computer space and sound equipment set it up.
Dave set up all the sound equipment ready for me. He knows about these things being a DJ etc so I let him borrow the equipment and set up. I had planned to start recording audio already, but being in Lockdown with a hyperactive 6 year old, grumpy husband, and 3 noisey dogs that will have to wait for now.
My craft space is going to be constantly evolving, so join our mailing list and subscribe to our YouTube channel so you don’t miss it.
