Make your own car themed MDF clock. Actually this clock isn’t limited to car themed, you could make it in any theme you like. Really easy to make using an old MDF clock, like I did, or a kit.
Whenever my son needs something for his room he has a particular theme in mind. This time it was a clock, a car themed clock.
Scrolling online trying to find exactly the right was a complete fail. he is very particular and wanted it to be colourful with a McLaren in the centre.
I had an old MDF clock that didn’t fit anywhere in our house. I’m going to show you how I used that to create the clock of my son’s dreams.
You Will Need
MDF Clock or MDF Clock Kit
Acrylic Spray Paint
Acrylic Paint Pens
Ultra Fine Black Marker
Clear Acrylic Spray Sealer
PVA Glue
HOW TO - DIY Children's Car Clock
Step 1
Painting the Clock Face
First I painted the face with white acrylic spray paint. The paint I used had a built-in primer so I didn’t need to use one separately.
Note I used an old clock, so it took 3 coats to cover the previous design.
Step 2
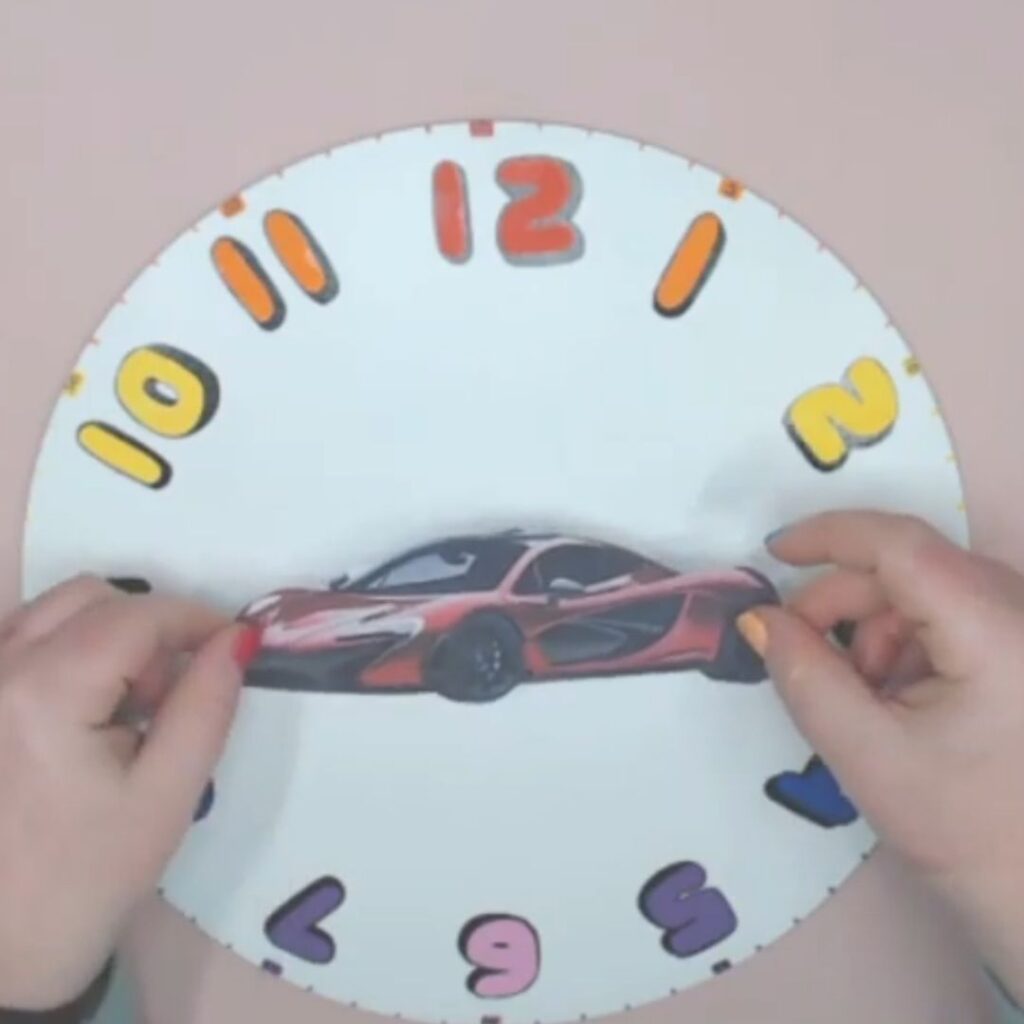
This is where using an old clock came in handy. Before I sprayed it I marked out where the numbers were. It meant that I didn’t have to spend ages sectioning it up to work out where the numbers had to be.
If you have got a clock kit it may take a little more time sectioning out the numbers on the face.
I drew out the numbers in pencil first just to make sure they were in the right position and I liked the way it looked.
If you want a ready to print clock, a found a really nice free printable learning clock on the Mini Eco blog. It is intended as a paper clock to help children learn, which is fab but would also be good to turn into a real clock.
After outlining the numbers with an ultra-fine tip Sharpie, I began to add colour.
I used Acrylic paint pens for this as they were more accurate than using a brush.
After painting the colours I went back around with the black shadows.
Step 4
Adding The Image
The image I’m using here is printed using an inkjet printer. I have a love-hate relationship with this.
I love that I can have any image, for any project, with the click of a few buttons.
What I don’t love is the ink running.
If you have read my blog post on my DIY Decoupage Mirror, you will know I have tried using inkjet print outs before.
When I made the mirror, I spray the images in hairspray first. FYI that doesn’t work very well.
Whilst the mirror was passable, and thankfully Kamran absolutely loves it, the yellow ink ran quite a bit.
This time I was more prepared for my experiment. I stuck down the car picture using a very thin layer of PVA glue. Just enough so that the image stuck but the paper didn’t soak through.
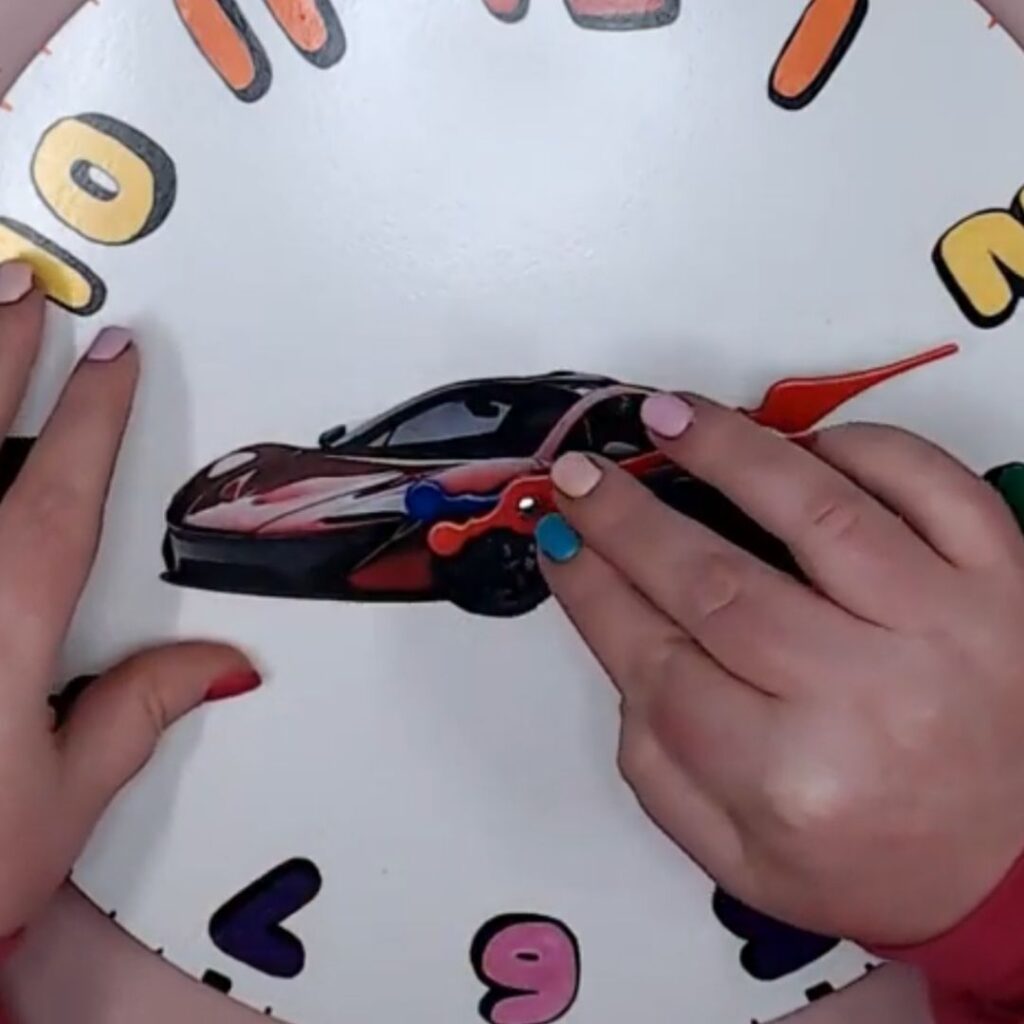
Once the car image was stuck down I took it outside and sprayed it with clear acrylic sealant. I applied 2 coats, letting it dry completely in between.
Step 5
The Clock Hands
The clock hands we originally black, and initially I was OK with this. I even put it up on the wall with the handles left black.
It was only after a day or so, I was collecting random socks from around Kam’s room for washing, and he asked me the time.
I looked up and realised that I couldn’t actually see the hands without studying the clock.
Lesson learnt, the clock came off the wall and the hands back off. I took them outside and sprayed them with the white spray paint I had left.
After they were dry, I used the acrylic paint pens to paint them red and blue. I finished them with some clear sealer spray, just to be sure the paint would stay.
Step 6
Reassembly
This was the part I had a little trouble with, I couldn’t remember how I took it apart.
I ended up watching a few videos before I found the solution.
So, unlike me, remember how it came apart. Maybe take some photos so you know, you will thank yourself later.
Not ready to make this right now?
Don’t forget to pin it for later!
For more ideas check out my other posts on the blog page.
Or head across to our youtube channel All Things Handmade for more diy and party planning videos.


